Showing posts with label Food Education. Show all posts

Thursday, January 16, 2020

Chef Ann Foundation - Parent Advocacy in School Food


I almost forgot how to get back on my blog...
It's been awhile my dear mullies, and it's sure GOOD to be typing and sharing here again today!

My latest blog is up today on the Chef Ann Foundation website! It's all about real school food parent advocacy + the powerful impact of our District 76 Wellness Team.

One Parent's Journey Towards Better School Food

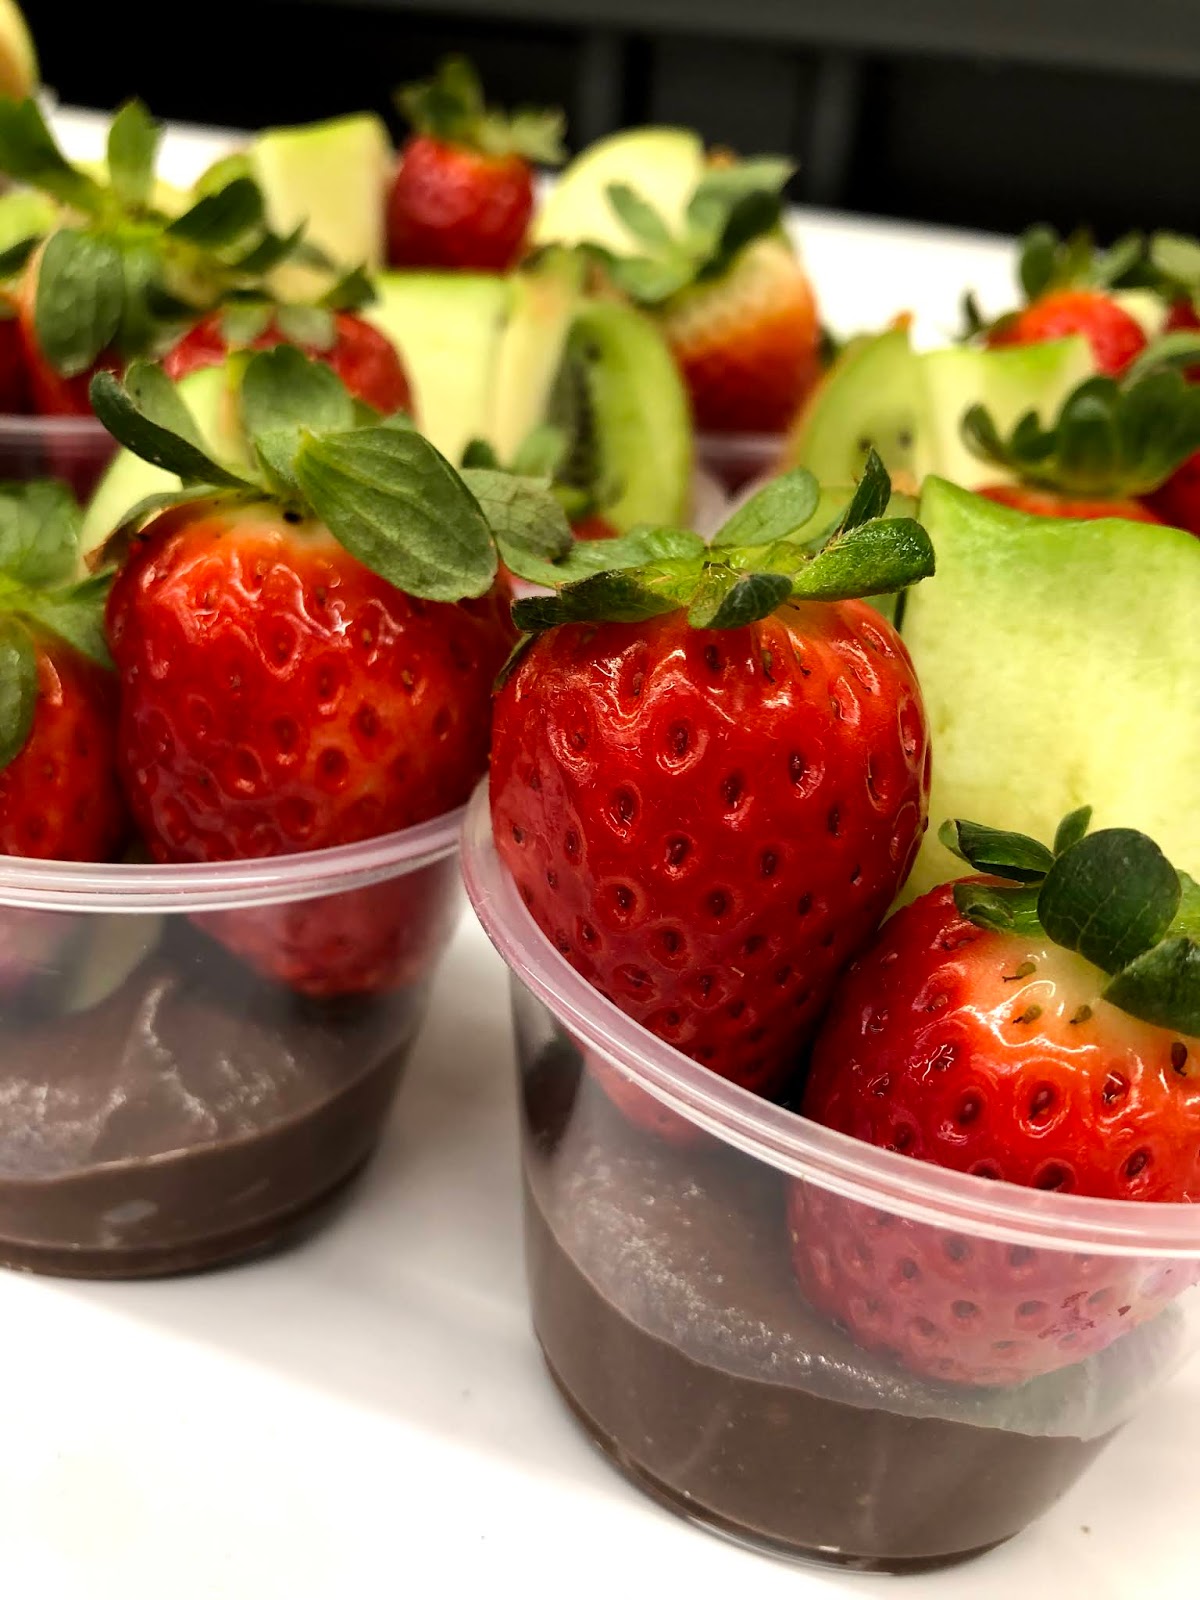
I must catch ya'll up to the recipes and pics from November + December's D76 Chef's Tasting Table in the lunchroom! The above pics are from our most recent Holiday tasting and below is the tasting we held right before Thanksgiving. Keep scrolling for the yummy recipes which I have included at the end!
xxxLindsey


Apple Carrot Slaw with Starfruit and Scallions

3 c (2lbs shredding carrots) from Prairie Wind Family Farms
3 sliced honey crisp apples
1/4 c honey mustard
1/4 c extra virgin olive oil
2 T apple cider vinegar
1 tsp salt
1/2 tsp pepper

Using a food processor, shred carrots with the medium grater. Switch out the blade and slice the apples thinly. In a medium bowl, whisk honey mustard, olive oil, vinegar, salt and pepper. In a large bowl, mix shredded carrots, sliced apples, and dressing until well mix. Garnish with sliced scallions and thinly sliced starfruit.

(*Recipe was x6 for 350 student & staff tastings)

Chocolate Black Bean Hummus + Fresh Fruit Dippers

1 can black beans, drained and liquid reserved. (Eden Organic brand is my favorite as the beans are already pressure cooked, which helps digestion).
4 Tbsp pure maple syrup
4 Tbsp raw cacao
1/2 tsp salt

In a food processor or high speed blender, mix all ingredients until smooth (stop and scrape the sides a few times). Add reserved liquid to thin to desired consistency. Favorite dippers = Strawberries, apples, kiwis, bananas, and oranges.
Optional: Add a few heaping Tbsp's of dark chocolate almond butter - YUM! Also, cannellini beans are my second favorite bean to use.

(*Recipe was x18 for 350 student & staff tastings)


Friday, January 18, 2019

Chef's Tasting Table 2019 | Citrus Bonanza + A Cara Cara Jam Jar Dressing


This was the 2nd annual Citrus Chef's Tasting Table and I'm already looking forward to our 3rd next year. It's a BIG in-season fan favorite for all.

Pictured from the top:
Pummelo's (the large yellow grapefruits)

I visited both Diamond Lake and West Oak back to back this week; Without a doubt, we have 750+ citrus lovers in our district!

Now that we have their attention, get your eaters to think outside of the orange-wedge-box and make your own jam jar salad dressing! You can thank me later for helping you to get your kids to eat their greens.

A Cara Cara Jam Jar Dressing

1-2 Cara Cara oranges juiced (about 1/4 cup. And type of orange will work here!)
2 Tbsp vinegar (any kind you have on hand - Apple cider vinegar, White vinegar, Red/White Wine vinegar, Balsamic vinegar all works)
1 Tbsp honey
1/4 c extra virgin olive oil
1/4 tsp iodized or sea salt
1/4 tsp pepper
1 garlic clove minced (optional)

Place all ingredients in a mason jam jar. Put the lid on and shake vigorously (a great job for kids!) until it's all mixed up. Enjoy on your favorite greens (my kids LOVE Gotham Greens), plus it would be delicious on fish too! Store in the refrigerator. 

To the mullies we go...
xoxoL

Thursday, January 17, 2019

Chef's Tasting Table 2019 | Chocolate Avocado Pudding with a Quick Blueberry Syrup


Everyone at Jewel thinks I'm nuts.
I think I am.

We are still recovering from this massive avocado processing we did before break. Thank you to the moon and back Steve Juracka (Assoc Superintendent & Wellness Chair), Julie Marchese (school nurse and wellness committee) and my amazing Mom Brenda (retired kindergarten teacher and best sous chef ever) for helping me scoop, process and fill up endless cups in the lunchroom! This food education day could not have been pulled off without YOU ALL! 🤛🏻👊🏻🤜🏻

I forgot to take pictures of the finished tasting cups. Bleh. 

So, to wet your whistles, here are some pictures of the day before in the Mundelein High School Transition Center where the participants did an incredible job "plating" their chocolate pudding and garnishes.


We had mixed reactions 👍🏻👌🏻👎🏻 which always means we are on track for stretching these students’ taste buds and food bravery. I especially love when staff ask me for the recipe!

Chocolate Avocado Pudding + Quick Blueberry Syrup
2 🍌’s
4 🥑’s
1/2 c raw cacao
1/2 maple syrup (add more maple syrup to taste if needed for your eaters) 
1 c milk of choice (I used organic rice milk for allergy awareness)
1 T pure vanilla extract
Pinch of salt

Blend everything until smooth in food processor. Ideally, chill in the refrigerator before enjoying with your favorite toppings.

I gotta tell you the story behind how the blueberry syrup came to be. 

I originally went to Prairie Wind Family Farm to pick up cranberries. With my sunglasses still on, I walked into the barn and looked in the coolers, but couldn’t find them and then decided to look in the freezer. There they were!


Except.
They weren't cranberries. 
They were blueberries.
Whooops! 

Thankfully, Jen let me keep them. And what a perfect switch up it turned out to be! 

Previously frozen fruit is PERFECT to make a quick syrup (heating on the stove will render a thicker, more intensely flavored syrup) and so that’s just what we did together at the D120 Transition Center + West Oak.

Here’s how you can make it too and it’s super fun to make with kids!

Quick Blueberry Syrup

2 c thawed, previously frozen blueberries 
2-3 Tbsp honey
pinch of salt

In a bowl, muddle together (I used a potato masher) the 2 cups of thawed blueberries with some honey and a pinch of salt. Smoosh the berries until all the pulp and juice is released. Pour the blueberry liquid through a fine mesh strainer and into a new bowl. Spoon this gorgeous liquid over anything your heart desires... vanilla ice cream anyone?


To the Mullies we go...
xoxoL

Friday, October 12, 2018

A Taco Tuesday Grape Salsa + Wild Orange Anything Dip


September was a BIG month for spreading food education and gorgeous food love in the schools! 

As a member of the Diamond Lake District 76 Wellness Committee, we wanted to do something special for the teachers to kick off the school year. 

Our committee cooked up this first round of "Lunch and Learns" where I visited each school's teachers' lounge (Fairhaven, Diamond Lake, and West Oak School) and treated the staff to some delicious recipes. 

We had such relaxed, fun conversation together around all things, mostly food! 

I made a "Wild Orange Anything Dip" and a "Grape Salsa" which I served alongside as much produce as possible from Prairie Wind Family Farms. Whenever possible, I partner with local farmers like Jen and Jeff Miller because every dollar goes back directly to their farm which improves Lake County's economic, social and environmental sustainability. I was able to find all pantry ingredients at Jewel & Target.

Wild Orange “Anything” Dip
Inspired by Sarah Britton's Tangerine Tahini Dip (My New Roots)

8 oz Almond Butter (or any seed/nut butter of choice)
1-2 knobs ginger minced (a heaping Tbsp or so)
8 tsp pure maple syrup
8 tsp apple cider vinegar
3 Tbsp coconut aminos (or tamari or soy sauce)
sprinkle of cayenne pepper (optional)
1/4 tsp sea salt
14 drops Wild Orange dōTerra essential oil (or use the zest and juice from 1-2 of your favorite fresh oranges!)
1/2+ c of any type of milk to thin out (I used macadamia nut milk)
1 tsp black sesame seeds
1 tsp local bee pollen 

Whisk together all ingredients in a large bowl and enjoy with your favorite vege and/or fruit! Store in the refrigerator and add into your lunch for the week. Garnish with black sesame seeds and local bee pollen for more lick-the-bowl goodness.

Keep hanging with me for the grape salsa recipe... 


As the Compass Hiking and Yoga Retreats Chef, this month also marked the launch of our Compass Outreach Program! I am thrilled to announce our partnership with Mundelein High School District 120 Transition Center. As a proud alumni of Mundelein High School and current resident in the community, it's an honor to be joining the participants and staff every month this school year.

We had a ball making the grape salsa together. Along with basic knife safety & cutting skills (like the "cat claw"), we discussed the different ingredients and the versatility of grape salsa; Whether you make it to trick out your Taco Tuesday, eat it alone, put it on on chicken, pour it over fish or add it to anything else you can dream up, it's a "food hero" dish for sure.


A Taco Tuesday Grape Salsa
Inspired by Sarah Britton's "Cleansing Grape Salsa" (My New Roots)

1 lb mixed grapes (we mixed red, green and concord varieties)
1 small serrano pepper (deseeded and minced)
1 bunch fresh chives minced
1/2 c (about 1 big handful) fresh cilantro chopped
1-2 knobs fresh ginger peeled & minced
4-5 radishes minced
2-3 limes juiced (plus zest from one lime or 3-4 drops of dōTerra lime essential oil)
1 Tbsp Thrive algae oil or extra virgin olive oil
Ionized salt or sea salt to taste

Combine all ingredients in a bowl and mix thoroughly.


It all starts at hOMe plate!

To the mullies we go...
xoxoL

Sunday, August 5, 2018

In the French Kitchen with Kids | Mr. Neil's Roast Chicken


It's an honor today to be posting about my friend Mardi Michel's new cookbook, In the French Kitchen with Kids. She and I connected back in 2012 as ambassadors in Jamie Oliver's Food Revolution Community and we are both hanging in strong today as global Super Ambassadors. 

Mardi Michels of Eat.live.travel.write is a full time French teacher in Canada and also teaches children how to cook twice a week in her school's food lab. 

She is such an inspiration! 

I'm singing her cookbook "to the Mullies" and beyond today. (Pronounced "Muh-lies," this means "Geronimo." My sister and and I coined the phrase back in the early 80's while jumping off high, scary places with unknown landings.) 

Isn't that like cooking (with or without kids)?

I have fallen unabashedly, head over heals, for her delicious French recipes... And so have my kids. Her well thought out cookbook begins with "top tips for cooking with kids" which are spot on for anyone who is interested in welcoming little ones into the craziness of a kitchen. She also outlines the basics (pantry ingredients & equipment) to get your French Kitchen party started. NOTE: This is NOT fancy stuff - Super doable, realistic and time tested by Mardi who is one of the most seasoned, practical chefs and teachers I know! The holidays are coming... time to get those lists started, or a quick trip to TJMax. The "kitchen blowtorch" is on my wish list. Crème brûlée, I'm coming after you.

This is the first post of many from her cookbook - Bon Appetite! 


I decided to cook up Mr. Neil's Roast Chicken for our dear friends who moved away to the Bahamas (Krissy's Gone Coconuts) last week. It was totally impromtu (they were packing and needed to be fed!). I invited the boys into the kitchen with me and it turned out to be the most wonderful going away dinner ever.


Let's rewind the evening and tell the picture story of how Mr. Neil's Roast Chicken came together.
(This cooking instastory can be found under ⚡️FoodEdFun⚡️highlights here.)


Tommy is my youngest and most enthusiastic chef. He tells me he wants to go to culinary school and live at home forever... my heart goes pitter patter.

Tommy says: "I want to stay home because at college you have to sleep there and I don't know if I'm gonna have a creepy cell mate."


A confident rock-chopper.

Tommy says, "Rock-chopping like a T-Rex!"


We had some good laughs stuffing the organic, pasture raised bird with lemons, garlic and thyme from our kitchen garden. Tommy had never stuffed a bird's cavity before. 

Tommy says, "This was disgusting, I didn't want to shove a lemon up the chicken's butt. But it was ok."


When Tommy's friend Wolfi came over, he just watched for a bit. It's rather unnerving watching someone prep a chicken for roasting if you've never done this before (I'll never forget putting pats of butter under a bird's skin for the first time myself!). I invited the boys to help me, made it fun, we laughed and relaxed... and they decided to join me!!

Don't worry if your little cooks decide not to join in... they might next time. I LOVE how Mardi coaches you through the unexpected food education moments in her cookbook:

"Kids might be squeamish about touching raw chicken (especially when it comes to placing the lemons, garlic and herbs in the cavity and butter under and over the skin.) The more they see you doing tasks like this, though, the more normal (and less gruesome) it will appear. In the meantime, get them busy chopping the vegetables and mixing in the oil and seasoning in the roasting pan."  Mardi Michels - In the French Kitchen with Kids 


Tommy says, "It feels super weird to put the the butter under the skin and feel it."


Can you believe I stretched this recipe for our entire dinner party! I made a quick gravy with the drippings from the root vegetables (the vegetables are the VERY BEST PART!!!!). I also froze the chicken carcass in a gallon freezer bag to make stock for a future soup night.

Boom.

Tommy says, "It was really tasty. It was really fun cooking with you again Mom. Can we make the french fries and chocolate croissants (pains au chocolat/chocolatines) next?"

Yes Tommy. Yes we can.

I will be making Mr. Neil's Roast Chicken again and again for my family table. Thank you Mardi + Mr Neil for including such a special recipe in your 1st cookbook. 

I'll be first in line for your 2nd someday.

Here is her amazing recipe for you to share with YOUR family table! 
*ps If you would like to share your experience with Mardi and others in the food education world, don't forget to use the hashtag #inthefrenchkitchenwithkids and #tothemullies*

I can't wait to be inspired by your French cooking adventure!

Mr. Neil's Roast Chicken {Poulet Roti}
Serves 4
Prep time: 25 minutes
Cook time: about 1.5 hours

INGREDIENTS
2-3 c roughly chopped assorted root vegetables (we used rainbow carrots, celeriac, turnips, potatoes)
2 medium yellow onions, thickly sliced
2 Tbsp olive oil
2 small lemons, grate the zest of one and use both for the chicken
6 sprigs fresh thyme (we also added 2 Tbsp fresh oregano leaves here)
2 tsp flaky sea salt
1 tsp freshly ground black pepper
1 whole chicken (ours was organic, antibiotic free and pasture raised from a local Midwest farm)
2 cloves garlic, unpeeled but smashed
A few sprigs of fresh thyme
1/4 c salted butter, at room temperature
1-2 tsp dried Herbes de Provence or dried thyme
Freshly ground black pepper

FOR BASTING
1/4 c salted butter melted
2 cloves garlic, unpeeled but smashed

  1. Preheat the oven to 425 degrees.
  2. Scatter the chopped vegetables in a roasting pan with olive oil. Add lemon zest, thyme, oregano, salt and pepper to the vegetables and, using your hands, mix until all the vegetables are coated. Make sure the vegetables are sitting evenly on the bottom of the roasting pan.
  3. Pat the cavity of the bird dry using a paper towel.
  4. Cut both of the lemons in quarters and place them in the cavity of the bird with the smashed garlic and a few sprigs of fresh thyme. If all the lemon quarters don't fit, you can pop them in the pan with the vegetables - just don't forget to take them out when you are serving the chicken.
  5. Cut about half of the butter into small pieces and place them under the skin of the bird. To do this, start at the cavity end of the chicken and slide on or two fingers between the meat and the skin. Work slowly, separating the skin from the meat as far as you can reach. Squish the butter pieces slightly and fit them under the skin as best you can.
  6. Spread the remainder of the butter over the outside of the skin. The easiest way to do this is with your hands. Season the bird with the Herbes de Provence or dried thyme and a touch of pepper.
  7. Place the bird directly on the vegetables in the roasting pan and place in the oven for 20 minutes, until the skin starts to brown nicely.
  8. Add smashed garlic to the melted butter and place this over very low heat on the stovetop. You will use this to baste the chicken while it's roasting.
  9. Turn down the oven to 400 degrees and roast the chicken for 60 to 70 minutes more, or until a meat thermometer inserted into the high part of the the thigh registers 165 degrees. Normally, you can count on about 20 minutes' cook time per pound of chicken but to be absolutely sure, a meat thermometer is the way to go!
  10. While the bird is cooking, baste it every 20 minutes or so with the melted butter and smashed garlic. This will season the bird even more.
  11. Once the bird is cooked, remove it from the oven (leave the vegetables in the roasted pan), place it on a cutting board (preferably one that has a drain ridge to catch any juices), cover it loosely with aluminum foil and allow it to rest for about 10 minutes before you carve it.
  12. Give the vegetables a good stir and place the roasting pan back in the oven until you are ready to serve the meal. If the vegetables are not crispy enough, you can set the boiler to high (around 400 degrees) and broil them for about 5 minutes, but do keep an eye on them as they might burn.
Follow Mardi with me on social media:

To the Mullies we go...
xoxoL